Showing posts with label DIY. Show all posts

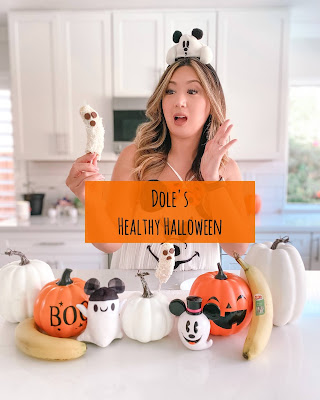
Dole's Healthy Halloween

 Boo!!!

I'm back after a little hiatus to bring you some Halloweentime fun! Today's post is all about getting into spooky snack mode and gearing up for some Healthy Halloween fun thanks to Dole!

** Dole provided me with compensation for my time and recipe development skills. As always, all opinions expressed are mine.**

Magic at Home: DIY Spring Mouse Pillow

Celebrate the Spring season with a soft & adorable seasonal DIY!


Looking for a fun and easy way to add a little Springtime magic into your home? How about a colorful, no sew mouse inspired pillow to add a little seasonal flair?! Read on for more!

Magic at Home: DIY Flower Mouse Ears

 Hearts, Flowers and a Little Dose of Mouse Ears


Happy February! It's officially Valentine's Day month and I'm here with yet another easy to create and fun seasonal craft: DIY Flower Mouse Ears!

Magic at Home: DIY Mouse Beret

 Everything's better with mouse ears!

Today I'm sharing a super easy tutorial is sure to add a little magical flair to your hat collection. Read on to find out how to create your own Mouse Beret!

Magic at Home: DIY Gingerbread Mouse Hat

 Sugar, Spice & All Things Ginger-Mice!


One of my favorite holiday loves is the Mickey gingerbread. The mix of classic mouse style & a dose of holiday gingerbread makes for the sweetest combo. What would make this mix even sweeter? Why an easy Ginger-mouse DIY hat of course. Read on the find out how to create your own!

Magic at Home: DIY Snow Mouse Decor

Ready for another SNOW-dorable DIY?


The holidays are in full swing and while many of us are staying home this season, I wanted to bring a little dose of cheer with another easy Snow Mouse inspired craft!

Magic at Home: DIY Snow-Mice Earrings

 SNOW-Cute!


It’s the merriest time of year and I’m getting into the holiday spirit with all the festive style! Read on to see how to create these SNOW cute Mickey & Minnie inspired earrings.

Magic at Home: DIY Mickey Pumpkins

Time to get magically spooky!

Ready to add a bit of Mickey magic to your Halloween season? Well do I have a craft for you! Let’s create some easy DIY Mickey pumpkins! Here we go!

Magic at Home: DIY Halloween Planters

Get your SPOOK on with these Halloween inspired Mickey planters!Ready to add a little Halloween-time fun into your home? Today I'm showing you an easy to create DIY featuring our favorite magical mouse with a side of spooky!

Magic at Home: DIY Watermelon Dress

One in a Melon!

Today is National Watermelon Day! To celebrate, I have another easy DIY tutorial for you all. So grab your glue guns and felt because today we're making a simple, no sew, watermelon dress!

Magic at Home: DIY Ice Cream Dress

I Scream, You Scream, We all Scream for Ice Cream!


July 19th is National Ice Cream Day! I'm celebrating this sweet day in two ways. With a cone of my favorite ice cream treat and this easy, no sew, DIY ice cream dress to match. Want to entire SCOOP? Read on to see the tutorial!

Magic at Home: DIY Mickey Musubi Dress

Musu-bae Magic!


I’ve been on a roll with all things musubi lately, so why not continue the fun with the easy, new sew DIY musubi dress!

Magic at Home: Mickey Musubi

Musubi Magic!
Bringing a dose of Disney Aulani magic today with this DIY Mickey Musubi!

Magic at Home: Toy Story Alien Pizza

OooOooh.... A pizza from the outside!

Ready for an easy, out of this world snack? Well grab your aprons space rangers because we're ready to blast off into some kitchen fun!

Magic at Home: DIY LEGO

I’ll never LEGO of you!


Time to grab your glue gun and creativity because it’s another easy and quick DIY: LEGO edition!

Magic At Home: Forky Milkshake

A Spork Shake? No, it's even better, it's a Forky Shake!
Mixing up a little magic at home with this easy to make Forky Milkshake!

Style Breakdown: DIY Easter Egg

It's time for an Egg-cellent style breakdown!
Easter is almost here and to celebrate, here's a little DIY breakdown of an easy to create Easter Egg, with a little Disney twist of course!

Extra- Eggstra!
Our most recent Disney adventures fell on the week before Easter. What better way to celebrate Spring and the upcoming holiday than with a little Egg-citing (how many of these Egg-puns can I add into one blog post?) DIY style!
Always having to go that "eggstra" mile when it comes to Ben's style, I wanted to create something fun to celebrate Easter. I've made it a point to try to craft a piece for each Disney trip we go on, and while it's extra work, there's just something so gratifying about creating and crafting up an idea for my little guy to wear. When dreaming up Ben's spring style, one image popped into my head right away... He just had to become a giant Easter egg!

Want to create your own egg? It's easy!
Materials Needed:
- multi colored felt
- glue gun
- fabric scissors
- polyfil stuffing
- a pen and paper to create your stencil

1. Gather your felt.

2. On a blank piece of paper create your "egg" template. Cut out.

3. Using the template, trace onto your felt 4x. Cut out.

4. Take two pieces of your "egg" shapes and using a hot glue fun, carefully glue the edges of your egg together. Be sure to keep your glue lines as even and close to the edges as possible. *Leave a 2-3in opening at the bottom of your glued egg.

5. Turn our egg inside out.

6. Stuff your "egg" to the desired puffed size with polyfil

7. Glue the opening of your egg shut.
8. Decorate your egg using different colored felt pieces, then glue onto your egg.

8. cut 1-2in wide pieces of felt to use as straps to hold your egg together and for your egg wearer's shoulder width. Just attach the straps with hot glue at the top of the egg. I've found that the hot glue is pretty good in keeping the straps on while Ben is wearing these types of outfits. If you'd like some extra reinforcement, you can hand stitch the straps for extra hold!

9. Poof! You're done!

As you can see from above, our little DIY Easter Egg is simple and will pay off with tons of cute! Hopefully this can help with any last minute Springtime crafts or style ideas for this Easter weekend! Thank you for reading and wishing you all the happiest Easter/Springtime weekend ahead! 💜


Dapper Day 2019

Our Very 1st Dapper Day
It's one the most fashionable Disney days of the year: Spring Dapper Day! Read on to hear all about our very first Dapper Day experience!

What took you so long?
Dapper Day, a day to step out in style at the Disney parks. It's an event that has been going on for years. It's a time for any Disney fans to break out their most fashionable attire and enjoy the parks in the most grand way. For details and a better history rundown of the event check it all out on the official Dapper Day page HERE.
From my own personal perspective, in all the time Dapper Day has been taking place, this was the first year, out of many, that we actually attended the fashionable day! So what took us so long to join in on the fun? When Dapper Day events first began happening at the parks I wasn't as big on the Disney fashion as I am now. Yes... there was a time when my life didn't revolve around the mouse and Disney style, shock I know! But as time went on and I started embracing my inner Disney fashion girl, and especially now with our family style.... my perspective started to change. I originally thought Dapper Day was intended for only the most notable of Disney fashionistas or only for those that were into retro/vintage/dapper style. All of which I wasn't really into at the time. Then, as the years passed I started to see more friends attend and realized that the day wasn't just for a particular niche of people. We started seeing regular families attend, your everyday park goers who took the event as their day to dabble into dapper waters for fun. Heck, we even saw some of our own family join in on the fun.  So when we learned of Spring Dapper Day, we decided to finally attend our first Dapper Day and see what all the hubbub was about!

Cars, but make it fashion
So with our first Dapper Day upon us the biggest question looming was "What are we going to wear?!". Since this was our first Dapper Day, the possibilities seemed endless, should I go full on princess mode? Should we try to go silly and be something unexpected? Then the lightbulb clicked and it was a style that we could all get behind: Pixar Cars!
PB has ALWAYS been the biggest car geek around, so Pixar's Cars is one of his Disney favorites. He doesn't show his excitement over too many things, but when it comes to cars and Disney's Carsland, he's all about it! His love for vehicles must have rubbed off on his son because Ben is currently OBSESSED with cars now, too! Take this kid into a parking lots and he'll just start exclaiming "Cars! Cars!". So after going through endless options on what to theme our first dapper should be, it dawned on me that we could get the best of all our worlds with a dapper Pixar Cars bound!

Cars Dapper Bound breakdown 
I can honestly say that I've never seen PB more excited for Disney style than he was with this Cars set! We decided that Ben would be our little Tow Mater since we could easily recycle clothing from his closet into the look. PB took on Lightning McQueen since it was the natural choice since his wife would be his Sally!

Side note, PB is the biggest Porsche geek around. No really, this guy is obsessed, so I wanted to do a Sally bound since she's a Porsche herself and I knew it'd (hopefully) make him smile a little bit if his wife was styled as the literal car of his dreams. LOL!

So how did this style come together? Here's how:
Tow Mater:

Materials:
- White button-down 
- brown or khaki shorts
- brown suspenders
- brown newsboy cap
- felt
- glue gun
- scissors

Ben already had a few of the pieces already in his closet, the shorts and button down were originally from Target and with the help of our favorite Amazon.com, I was able to find the perfect set of baby suspenders and a bowtie, along with shoes and his newsboy cap.

Everything is pretty self expalnatory with this look, the only DIY aspect is the hat, I attached two little felt rectangles to the brim of the hat to create the "Mater Teeth"

Lightning McQueen
Materials:
- Red button down tee
- black pants
- racing stripe/checkered flag suspenders
- yellow bow tie

Again, this look is pretty self explanatory. The only DIY aspect was a tiny felt "95" brooch I made for PB to wear on his suspenders. That was made out of yellow and orange felt and pinned on with a safety pin.

Sally
\

Materials:
- blue retro inspired dress
- Porsche patch or pin
- black pillbox hat
- glue gun
- black and grey felt
- polyfil stuffing

I found a simple blue retro inspired dress off of my favorite Amazon, along with a grey petticoat to wear under. With the addition of a simple Porsche emblem patch found off Etsy, the look was almost complete! The hardest part of my Sally style was my "tire" hat since I went a little extra on the details. You can easily just cut out tire shaped pieces and directly attach to the hat base. But me being me, I just had to go that "extra mile". I ended up gluing an set of felt on the hat base, stuffed it with polyfil for dimension, then glued it together to create a 3D tire effect.

The happiest place of style
With our style set, we ventured down to Disneyland for our first Dapper Day! Boy oh boy was it such an extraordinary day. We spent a good chunk of our time in Carsland since we just soaked in the the cars scene in our respective outfits. It was a total win for Ben since he loved just watching the Cars zoom by on Radiator Springs Racers. He even managed to get his dad to buy him a new Cars toy as a keepsake from our fun fueled day.
What was quite amazing was how the entire atmosphere of the parks was just surging with so much Dapper energy. Sure, you can get dressed up any day for the parks, but an entire day/weekend dedicated to retro fashion? Thats where the magic comes in. Just walking though the parks and being surrounded by so many fellow Dapper dressed guests made it feel like you were transported to a different time. It was truly wonderful to just see the crowds of people dressed in their best.
There was also a sense of so much style togetherness. I witnessed so may people complementing each other on their style, others were striking up conversations with people they just met and and bonding over the dapper magic. On our end, we had a magical day because so many of our friends were around at the same time. We were able to real life meet so many of our Instagram pals in one day!

This is why I felt like Dapper Day (and Disney in general) is so magical. It created such a sense of community all day long and it was perfect. I realized that I was completely wrong with my initial hesitations year before on attending this event. I had it in my mind that Dapper Day was just for the most retro/stylish Disney person, but in reality, it's a day for everyone! We saw families,  grandparents, couples, people of all ages, ethnicities and backgrounds all embracing their inner style! There were the most creative character bounds, styles based on colors, and just plain amazing fashion. Some were homemade, some were detailed DIY,  others were true vintage, some pieces off the rack... regardless of how the fashion came to be or who was wearing it, the end point is that it was all so beautiful!

When can we do this again?
I can now say that I'm 100% a fan of Dapper Day. You know we had a good time when PB said "I'd do this again, what are we going to be next?". Thats a win in my book. So thank you for a beautiful soiree, Dapper Day! Cant' wait for the next event!

Style Breakdown: Celebration Outfits!

Cue the Confetti because it's a CELEBRATION!

In one of the proudest DIY moments I've had to date, I present to you our mommy and me Celebration outfits! Read on to find out why this colorful concoction of felt, poms and a whole lot of love means so much...

A colorful reveal
Back in 2018 when the world was celebrating Mickey Mouse's 90th birthday, the Disney Parks were cooking up something quite amazing: brand new character outfits!!! And these weren't just any regular outfits, this was a whole colorful, fun, and festive new celebration style for your favorite Disney pals. I still remember the seconds after seeing the costume reveal and thinking "I HAVE TO MAKE THESE OUTFITS!". There was the strongest pull to Minnie's dress in particular, there were rainbow pom poms, tulle, glitter... It screamed happiness and I knew right then and there that I had to find a way to DIY this look. Mickey's outfit was another that I thought would be adorable for little Ben. The rainbow confetti on a capri suit? Strange on a grown man, but on a mouse and toddler? Adorable!

All the felt in the world
When we booked our March Disney trip in February, I knew I had a good amount of time to prep our DIY outfits. Since each piece of the outfits were pretty specific, I had to scour all of Amazon.com, my favorite Disney style go to, in order to find the items needed. After gathering the base pieces, I next turned to my big o' box of felt, a treasure trove of felts, fabrics and random craft pieces usable for these specific types of projects. Mix in a couple of bags of colored poms from a craft store and you're all set to create a memorable celebration look!

If you want to check out my celebration style Amazon list you can find it HERE **This is an Amazon Affiliate link to my idea list page.**

Mickey capris and confetti
So here's my breakdown of our DIY Celebration style. Once again, much like my previous Donut style breakdown, I apologize for the lack of detail, photos, and more. I wasn't expecting to write up blog tutorials on these looks, so hopefully my random step by step process can somewhat help!

Mickey's style

Materials Needed:
- White Toddler suit 
- Multi colored felt
- fabric scissors, small size will work best for the little details
- hot glue gun and lots of extra glue sticks
- clear vinyl (about 4x4in)
- loose confetti or glitter

1. Begin by cutting LOTS of felt confetti pieces. I'm really particular, so I went the extra mile and cut various sizes, shapes, etc.
2. Start gluing the confetti pieces to the suit. The park version has more confetti at the top of the suit and gradually decreases as it gets to the bottom.

3. Cut the suit pants to desired length and glue the new hem length. For Ben it was taking off a few inches to hit a little below his knee.
4. Attach felt confetti to pants.


Vinyl Confetti Bowtie
1. Fold your pieces vinyl in half, glue edges together. Glue other end shut, leaving an opening at the top to fill with glitter.
2. Using opening, fill with confetti or glitter.
3. Glue open side shut.
4. Use a small strip of yellow felt to bunch center together, glue. This should create your "bow" shape.
5. Using glue, attach to a blank white onesie.

Minnie Style

Materials needed
- White tulle skirt or plain white skirt (under base)
- 2 yards of white tulle
- waist length of elastic band
- colorful pom poms of varying sizes
- basic white top
- faux yellow buttons
- yellow belt
- clear vinyl
- loose confetti or glitter
**Link to the pieces for my celebration dress HERE.**

Pom Dress
I don't know how to sew, but my amazing husband does! He took a Home Ec class in high school where he learned how to use a sewing machine. Year later, his basic machine skills are coming in handy in the present so he can help me create basic pieces, like the pom tutu!

1. We used the following easy sew tutu tutorial to create the outer pom skirt. Adjust measurements for adult sizing https://www.instructables.com/id/Rainbow-Pom-Pom-Tutu-Dress/
**If you have no sewing skills like me, you can cheat the look by purchasing a white tulle skirt and adding poms to the layers of the skirt**
2. After completing your exterior tutu, set aside and begin gluing poms to your separate under base skirt to create a cascading pom look when the top tutu is layered.
3. Glue faux buttons onto tee.
4. Glue poms onto sleeves of your tee. I used smaller poms starting that the top of the sleeve and gradually increased the size towards the bottom.
5. Glue confetti to belt.

Celebration Minnie Bow
1. Cut vinyl into rectangular shape of desired sizing.
2. Fold vinyl in half and glue
3. Glue one of the open sides shut, leaving the opposite end open.
4. Pour glitter or confetti into open end, once desired amounts of confetti are in, glue shut.
5. Use a piece of yellow felt to cinch the center together to make your bow.
6. Attach to headband or onto a blank pair of ears using glue to finish off the bow look!

A coordinating husband
PB didn't want to partake in the confetti style goodness, but thankfully, he had the perfect tee to match! He's wearing the "Happiest Days on Earth" tee by the amazing Made of Wonders! Here's a direct link to the tee Made of Wonders Happiest Days Tee. The tee ended up matching so well with our over the top confetti and pom style!

The colorful finale!
The Celebration style dream come to life!!! The work that went into these outfits took a ton of time, effort, glue gun skills and most of all patience. Looking back at everything, the outfits were actually super simple in concept, but the details are what can get to you after cutting and gluing felt and poms for hours on end. As hard as it was at times... and never wanting to ever cut felt confetti for the next 5-10 years... I'm so happy with how it all turned out! This outfit was a true labor of love and magic!

So there you have it! A breakdown of our Celebration Confetti style! The construction is actually  pretty straight forward but it's in the little details that can take your outfit to a while other level! It's easy to get overwhelmed by so much glitter and felt, but in the end, it's a colorful and happy result. Overall, with a lot of faith, LOTS of hot glue, and a whole lot of love you can end up with a magical celebration outfits on Earth! Thank you for reading and until next time... take care! 💜